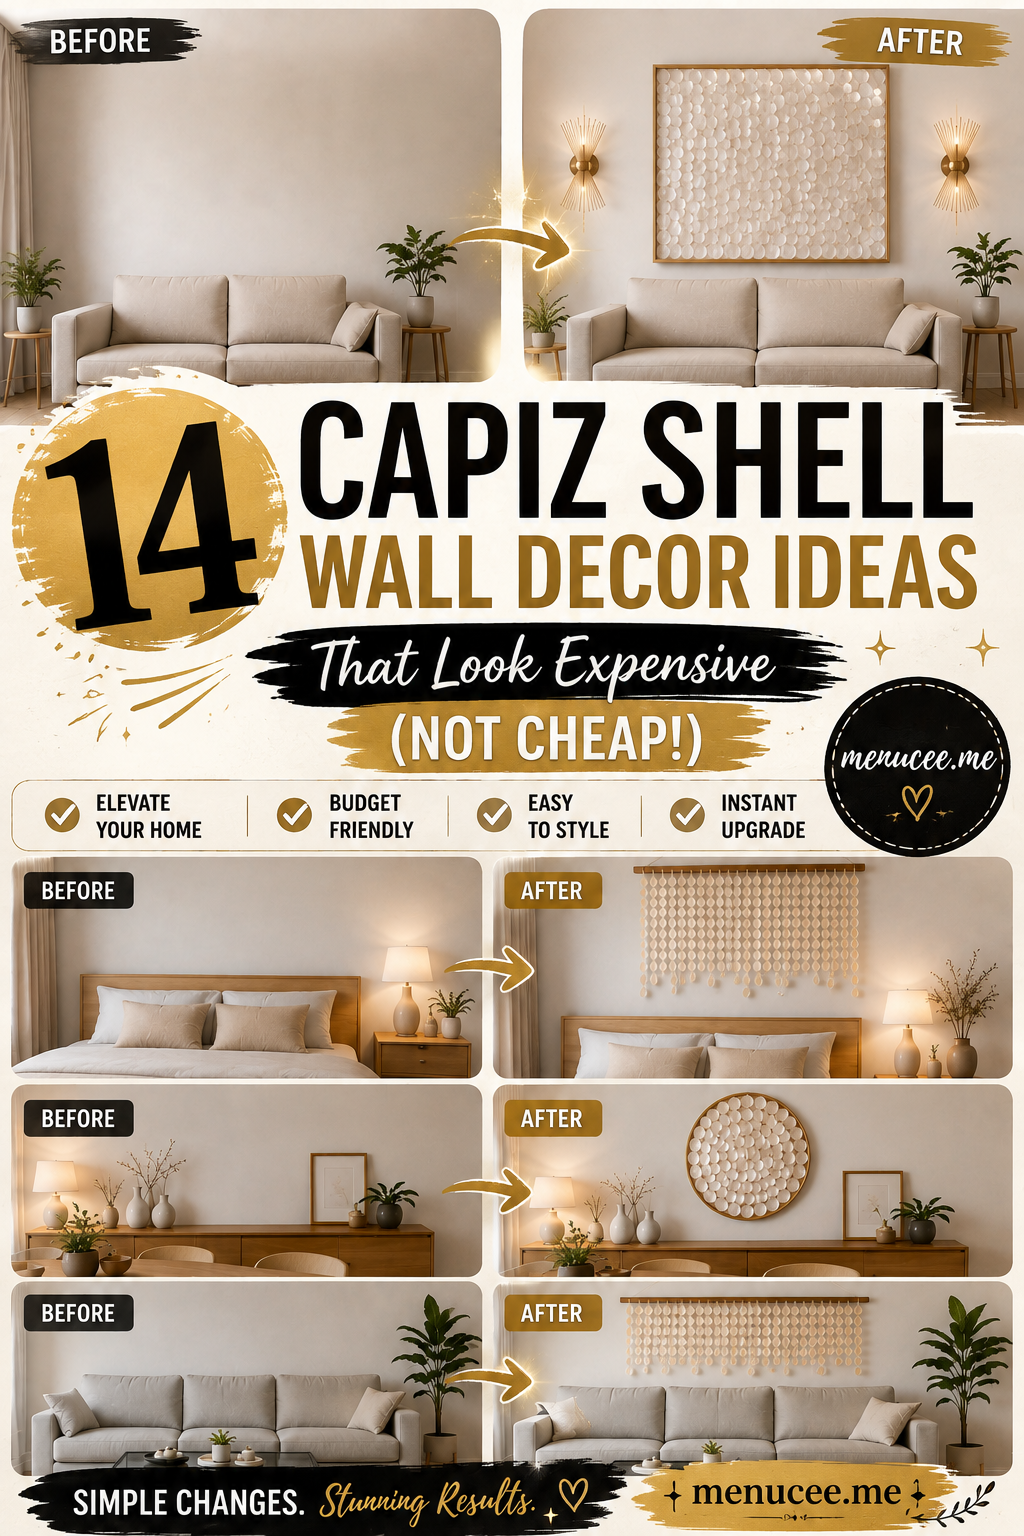
14 Capiz Shell Wall Decor Ideas That Look Expensive (Not Cheap)
Capiz shell wall decor has a beautiful way of making a room feel airy, elegant, and expensive without looking overly decorated. The naturally translucent shells catch light beautifully, which makes them especially appealing for bedrooms, living rooms, entryways, dining areas, and coastal-inspired homes.
The secret to making capiz shell decor look high-end instead of cheap is all about the styling. Choose a simple colour palette, avoid using too many decorative elements, and combine the shells with natural wood, brass, rattan, linen, or neutral walls.
You also don’t need to spend a fortune on ready-made wall art. With inexpensive capiz shell pieces, a simple frame, and a few basic craft supplies, you can create beautiful DIY wall decor that looks much more expensive than it actually costs.
Here are seven stylish ideas to try.
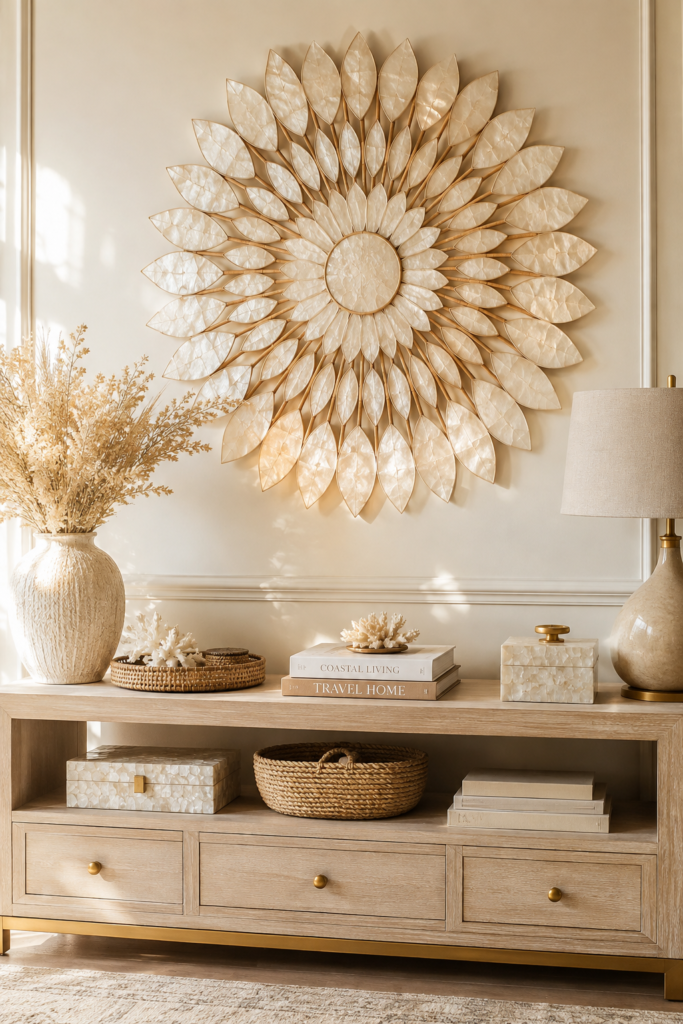
1. Elegant Capiz Shell Sunburst Wall Art
A sunburst design is one of the easiest ways to make capiz shells look luxurious. Instead of placing the shells randomly, arrange them in symmetrical layers radiating outward from a central point.
This design works beautifully above a console table, bedroom dresser, sofa, or entryway table. For an expensive appearance, keep the frame simple and choose neutral shells rather than mixing several bright colours.
🧰 Materials Needed
- Flat capiz shell pieces
- Round wooden or MDF backing
- Strong craft glue
- Small round mirror or wooden centre piece
- Gold or natural wood frame
- Pencil
- Ruler
- Hanging hardware
- Optional clear protective spray
🔨 How to Make
- Place the round backing on a flat work surface.
- Mark the exact centre with a pencil.
- Place a small round mirror or decorative centre piece in the middle.
- Arrange capiz shells around the centre in a symmetrical sunburst pattern.
- Start with the inner layer and gradually work outward.
- Glue each shell securely after checking its position.
- Allow the glue to dry completely.
- Place the finished piece inside a simple wood or brass-toned frame.
- Add hanging hardware to the back.
- Hang it where natural or warm artificial light can hit the shells.
📝 Description
The beauty of this project comes from symmetry. A carefully arranged capiz shell sunburst can resemble high-end coastal or designer wall art. The translucent shells reflect light softly, while a simple wooden or brass frame gives the piece a polished finish. Keep the surrounding decor minimal so the wall art becomes the focal point.
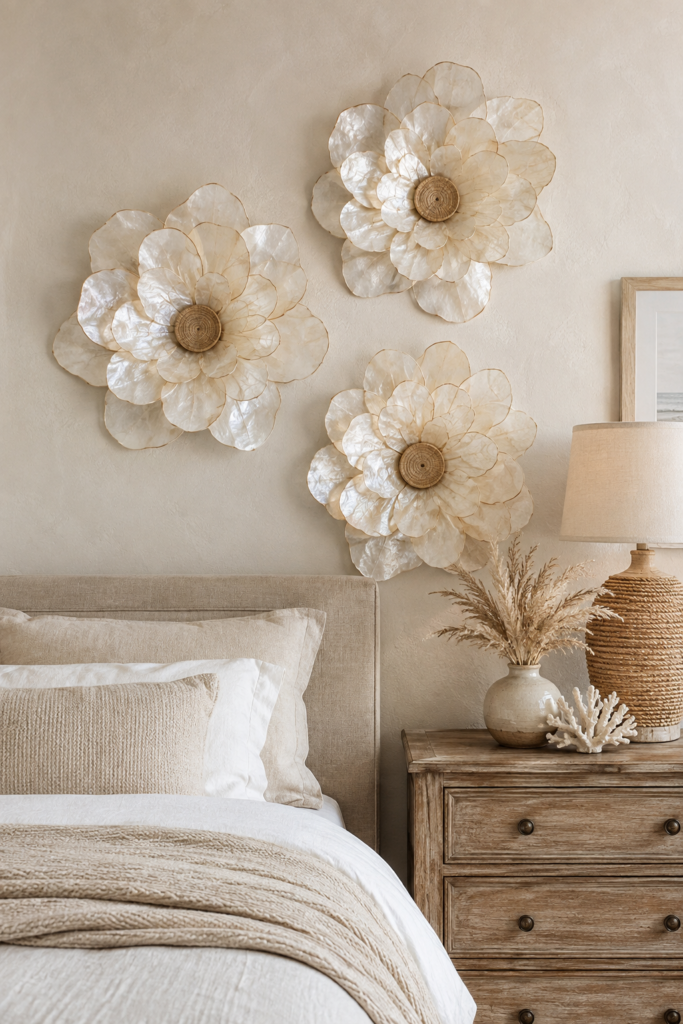
2. Large Capiz Shell Flower Wall Art
If you want something softer and more decorative, create oversized capiz shell flowers.
The flowers can be arranged as a small group or displayed as one large statement piece. This idea works particularly well in bedrooms and living rooms because the organic shape adds texture without making the space feel heavy.
🧰 Materials Needed
- Flat capiz shell pieces
- Round wooden backing
- Craft glue
- Small wooden bead or decorative centre
- Neutral acrylic paint
- Thin wire
- Picture hanging hardware
🔨 How to Make
- Choose a round wooden backing for each flower.
- Paint the backing in white, cream, beige, or another neutral shade.
- Arrange the capiz shells around the centre like flower petals.
- Use different shell sizes to create layered petals.
- Glue the inner petals first.
- Add a second layer around the outside for more dimension.
- Place a wooden bead or decorative centre in the middle.
- Let the glue dry completely.
- Attach hanging hardware.
- Display three flowers together for a designer-style gallery arrangement.
📝 Description
Capiz shell flowers bring a feminine, coastal touch to an otherwise simple wall. The trick is to avoid making every flower identical. Slight variations in size and petal arrangement make the display feel handmade and sophisticated. A neutral colour palette keeps the project looking refined rather than overly crafty.
3. Capiz Shell Hanging Wall Panel
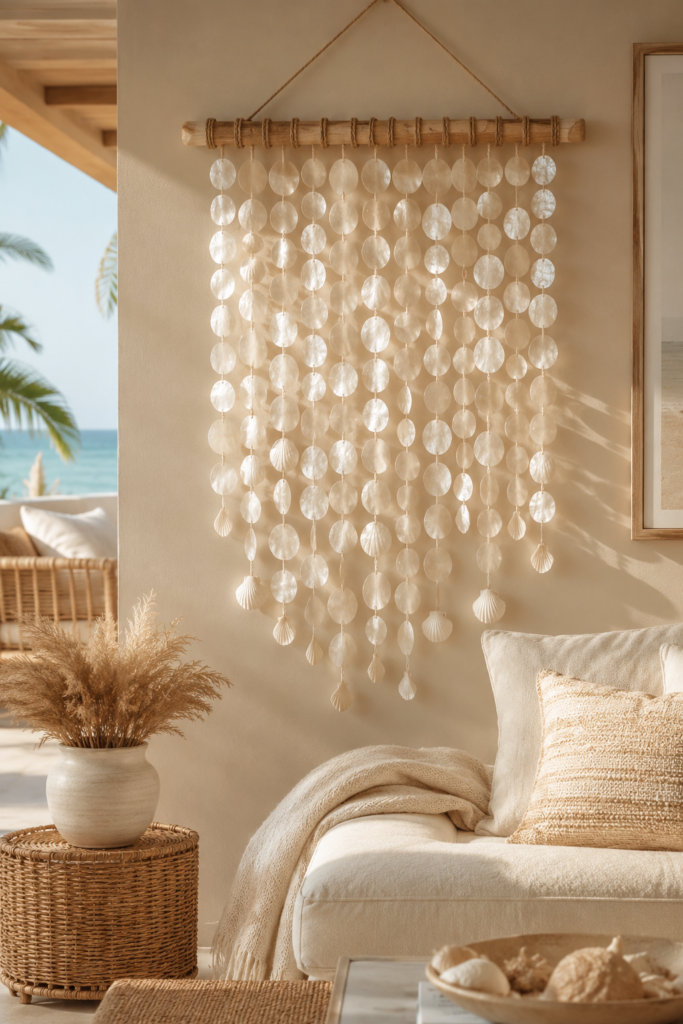
A hanging capiz shell panel is perfect if you love relaxed coastal interiors.
Instead of gluing shells onto a solid board, attach them to thin strands hanging from a wooden dowel. The movement of the shells creates beautiful reflections whenever air moves through the room.
🧰 Materials Needed
- Capiz shell discs or pieces with small holes
- Natural wooden dowel
- Cotton cord or strong fishing line
- Small wooden beads
- Drill or hole punch if needed
- Scissors
- Wall hooks
- Measuring tape
🔨 How to Make
- Cut several equal lengths of cord.
- Attach each cord to the wooden dowel.
- Thread capiz shells onto each strand.
- Add small wooden beads between some shells.
- Keep the spacing consistent for a polished appearance.
- Tie secure knots beneath the shells.
- Attach the dowel to two wall hooks.
- Arrange the strands so they hang at slightly different lengths.
- Check that the panel is balanced.
- Hang it away from high-traffic areas where the shells could be bumped.
📝 Description
This hanging panel gives you the delicate beauty of capiz shells without requiring a large solid frame. Natural wood and cream-coloured shells create an organic combination that works especially well with coastal, boho, beach-house, and relaxed modern interiors.
4. Capiz Shell Mirror Frame
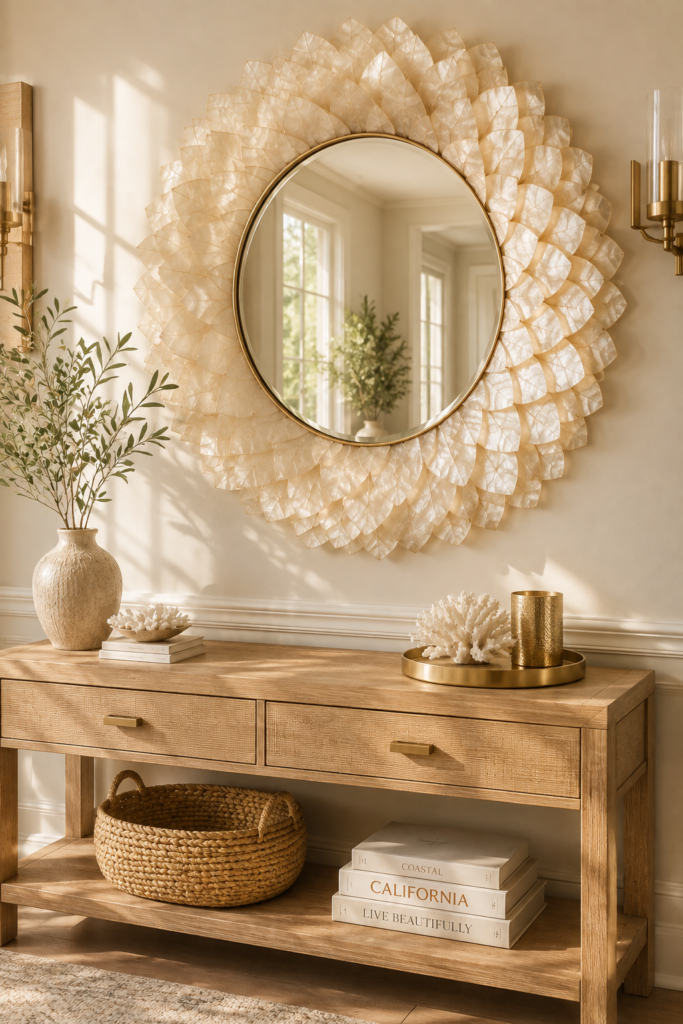
One of the best ways to make inexpensive capiz shells look luxurious is to combine them with a mirror.
A simple round or oval mirror becomes much more interesting when surrounded by overlapping shells. The reflective glass and translucent shells work together to bounce light around the room.
🧰 Materials Needed
- Round or oval mirror
- Flat capiz shell pieces
- MDF or plywood backing
- Strong adhesive
- Neutral wood frame
- Measuring tape
- Pencil
- Hanging hardware
🔨 How to Make
- Choose a mirror that fits the wall.
- Cut or purchase a backing slightly larger than the mirror.
- Secure the mirror to the backing.
- Mark the outer edge of the frame.
- Arrange capiz shells around the mirror.
- Slightly overlap the shells to create a layered effect.
- Keep the arrangement symmetrical.
- Glue the shells one section at a time.
- Allow the adhesive to cure fully.
- Add hanging hardware and mount the mirror securely.
📝 Description
A capiz shell mirror can instantly make an entryway, bedroom, or living room feel brighter and more sophisticated. The key is to use a consistent shell colour and avoid adding too many competing embellishments. Pair it with warm wood, neutral textiles, or subtle brass accents for an upscale finish.
5. Minimalist Capiz Shell Gallery Wall
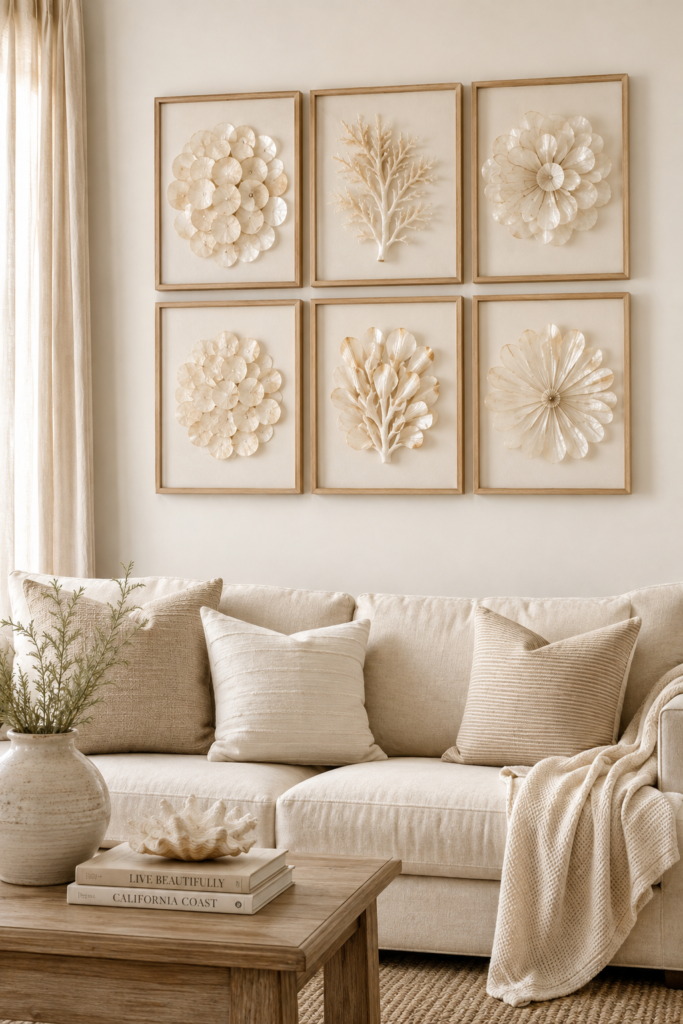
You don’t always need one huge statement piece. A collection of small capiz shell artworks can create a beautiful gallery wall.
For a high-end appearance, use identical frames and keep the spacing between each piece consistent.
🧰 Materials Needed
- Small capiz shell pieces
- 3–6 matching frames
- White or cream cardstock
- Craft glue
- Measuring tape
- Level
- Hanging hooks
- Pencil
🔨 How to Make
- Remove the glass from the frames if necessary.
- Cut cardstock to fit each frame.
- Arrange capiz shells in simple patterns.
- Glue the shells onto the cardstock.
- Let each artwork dry completely.
- Place the finished pieces inside matching frames.
- Measure the wall before hanging.
- Mark equal spaces between each frame.
- Use a level to keep the artwork straight.
- Hang the pieces in a clean grid.
📝 Description
A minimalist capiz shell gallery wall is perfect for anyone who wants subtle coastal style without filling an entire wall with shells. Matching frames make inexpensive materials look more coordinated and intentional. White, cream, natural wood, or soft brass frames work particularly well.
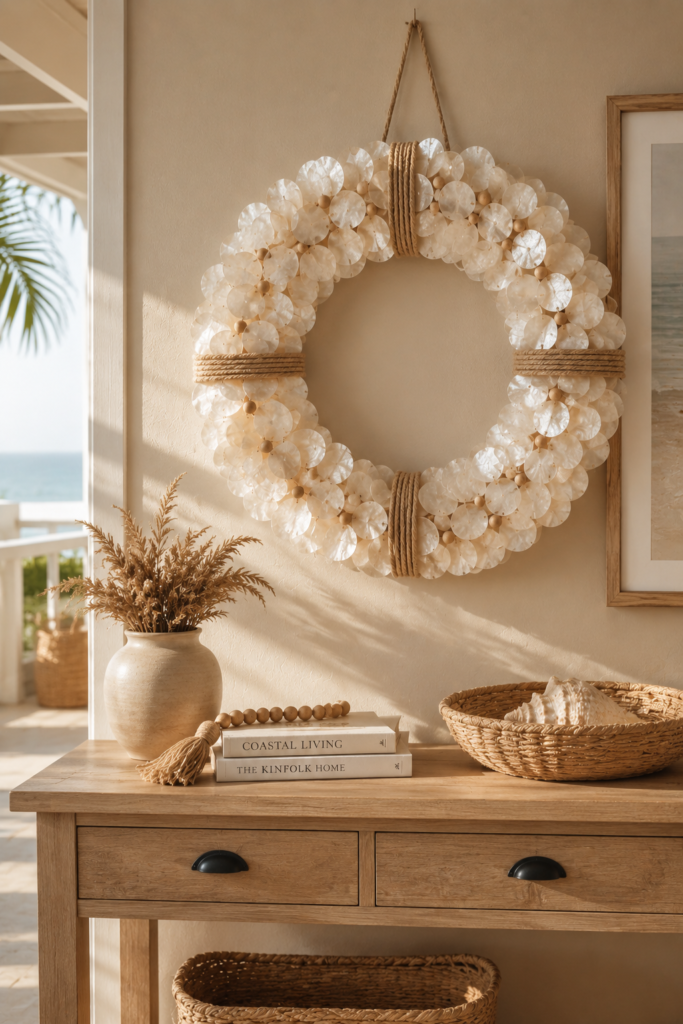
6. Capiz Shell Coastal Wall Wreath
A capiz shell wreath can bring texture and dimension to an entryway, bedroom, or dining room.
Instead of a traditional greenery wreath, use overlapping shells to create a soft circular shape.
🧰 Materials Needed
- Capiz shell pieces
- Round wreath form
- Strong craft adhesive
- Natural rope
- Small wooden beads
- Optional dried palm leaves
- Hanging hook
🔨 How to Make
- Cover the wreath form with neutral fabric or rope.
- Arrange capiz shells around the outer edge.
- Slightly overlap each shell to create fullness.
- Continue working around the wreath.
- Add a second layer toward the centre if desired.
- Place a few wooden beads or dried leaves as accents.
- Allow the adhesive to dry completely.
- Add a rope loop to the back.
- Hang the wreath on a sturdy wall hook.
📝 Description
This shell wreath gives a room a relaxed coastal feeling while still looking polished. Keep embellishments minimal and let the natural translucency of the shells be the main feature. A simple rope detail can add warmth without making the piece look overly beach-themed.
7. Oversized Capiz Shell Statement Art
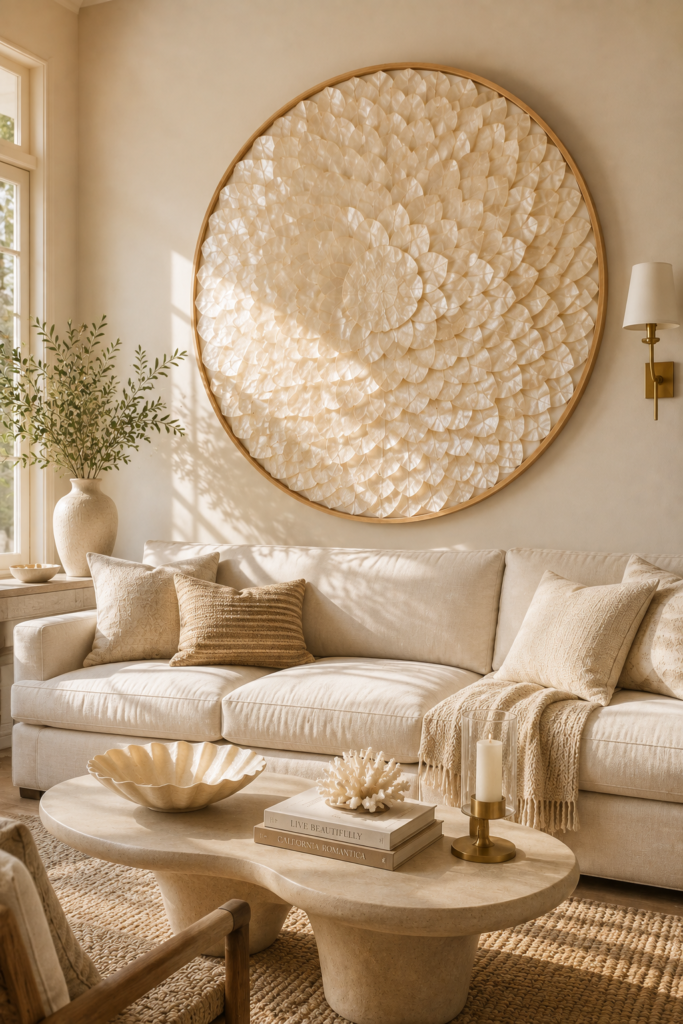
If you want your wall decor to look truly expensive, go bigger.
Create one oversized statement piece using large capiz shell shapes arranged on a neutral backing. The large scale makes the design feel intentional and designer-inspired.
🧰 Materials Needed
- Large capiz shell pieces
- Large round MDF or plywood board
- Strong craft adhesive
- Neutral paint
- Natural wood frame
- Hanging hardware
- Measuring tape
- Pencil
🔨 How to Make
- Choose a large round or rectangular backing.
- Paint the backing in a soft neutral colour.
- Plan the shell arrangement before gluing anything.
- Start from the centre and work outward.
- Use larger shells toward the centre.
- Gradually transition to smaller shells around the edges.
- Keep the pattern symmetrical or intentionally organic.
- Glue each shell securely.
- Add a simple natural wood frame.
- Attach heavy-duty hanging hardware appropriate for the finished weight.
- Mount the artwork securely to the wall.
📝 Description
Oversized artwork can make a room feel more sophisticated because it creates one strong focal point instead of several small decorations competing for attention. Capiz shells are especially effective for this because their translucent surface creates subtle texture and catches natural light. Hang the finished piece above a sofa, bed, dining table, or large console for maximum impact.
8. Capiz Shell Geometric Wall Art
📝 Description
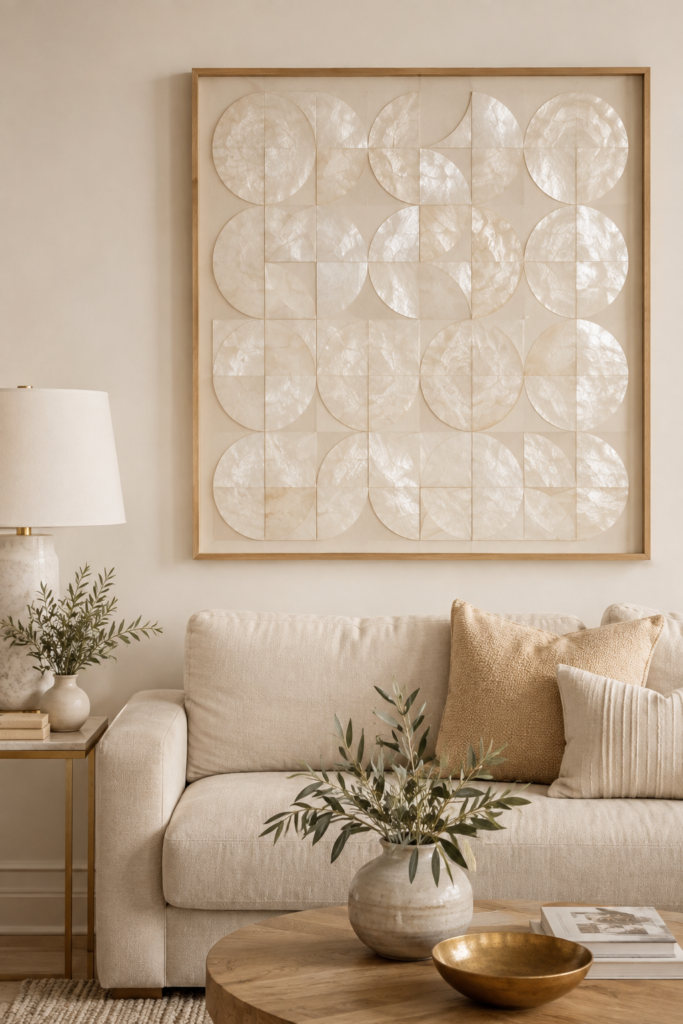
Create a modern geometric design using capiz shells arranged in clean lines and simple shapes. This style looks especially expensive when paired with a thin black, brass, or natural wood frame. It works beautifully in modern living rooms, home offices, bedrooms, and entryways.
🧰 Materials
- Flat capiz shell pieces
- MDF or plywood backing
- Thin wooden frame
- Strong craft adhesive
- Ruler
- Pencil
- Neutral paint
- Hanging hardware
🔨 How to Make
- Paint the backing in white, cream, or beige.
- Use a ruler and pencil to lightly mark geometric sections.
- Arrange the capiz shells inside the marked shapes.
- Keep the spacing between the shells consistent.
- Glue each shell into position.
- Allow the artwork to dry completely.
- Add a thin wood, black, or brass-look frame.
- Attach hanging hardware and display it on a clean wall.
9. Capiz Shell Floating Wall Panels
📝 Description
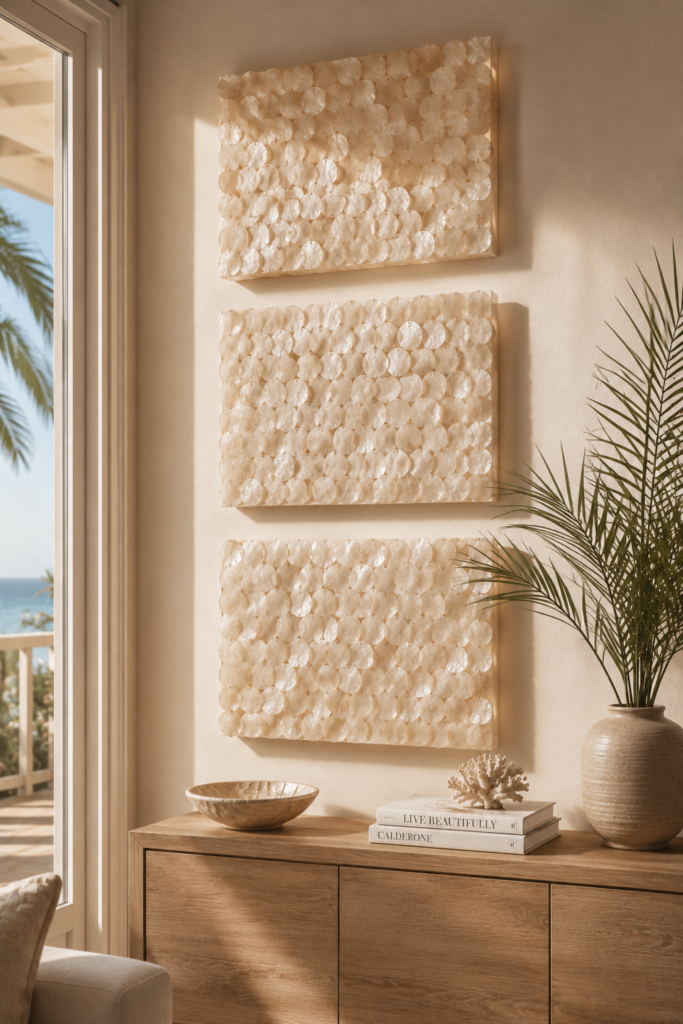
Floating wall panels give ordinary shell art a more architectural and luxurious appearance. Instead of placing shells directly on the wall, mount them on slightly raised panels. The small shadow around each panel creates depth and makes the installation feel custom-designed.
🧰 Materials
- 3 rectangular MDF panels
- Capiz shell pieces
- Strong adhesive
- Neutral paint
- Small wooden spacers
- Wall anchors
- Hanging hardware
- Measuring tape
🔨 How to Make
- Paint all three MDF panels in the same neutral colour.
- Plan a simple shell arrangement on each panel.
- Glue the capiz shells onto the panels.
- Leave a small border around each panel.
- Let the shell artwork dry completely.
- Attach small spacers to the back of each panel.
- Secure the panels evenly on the wall.
- Leave equal spacing between each panel for a professional gallery effect.
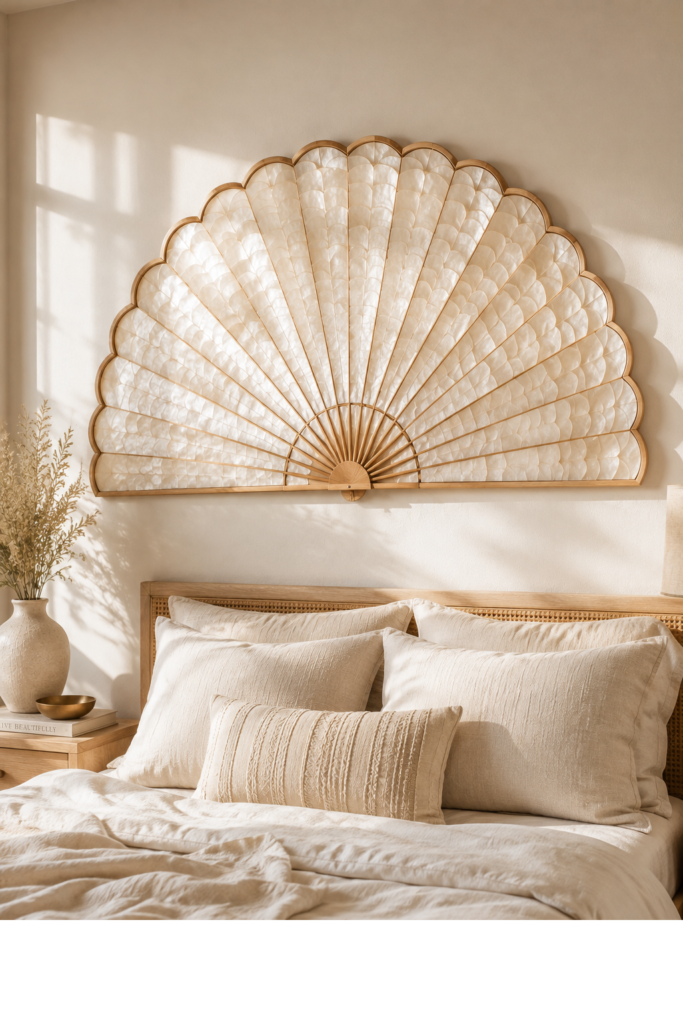
10. Capiz Shell Fan Wall Decor
📝 Description
Fan-shaped capiz shell art has an elegant, sculptural appearance. Arrange shells in overlapping layers to create a decorative fan that can be displayed individually or as a set of three. This idea is perfect for a bedroom, dining room, or above a console table.
🧰 Materials
- Long and flat capiz shell pieces
- Round MDF backing
- Strong craft glue
- Natural wood frame
- Pencil
- Measuring tape
- Hanging hardware
🔨 How to Make
- Mark the centre point of your backing.
- Arrange the longest shells at the centre.
- Gradually position shorter shells toward both sides.
- Slightly overlap the shells to create a fan shape.
- Check that both sides look balanced.
- Glue the shells securely.
- Add a simple natural wood frame if desired.
- Let everything dry before hanging.
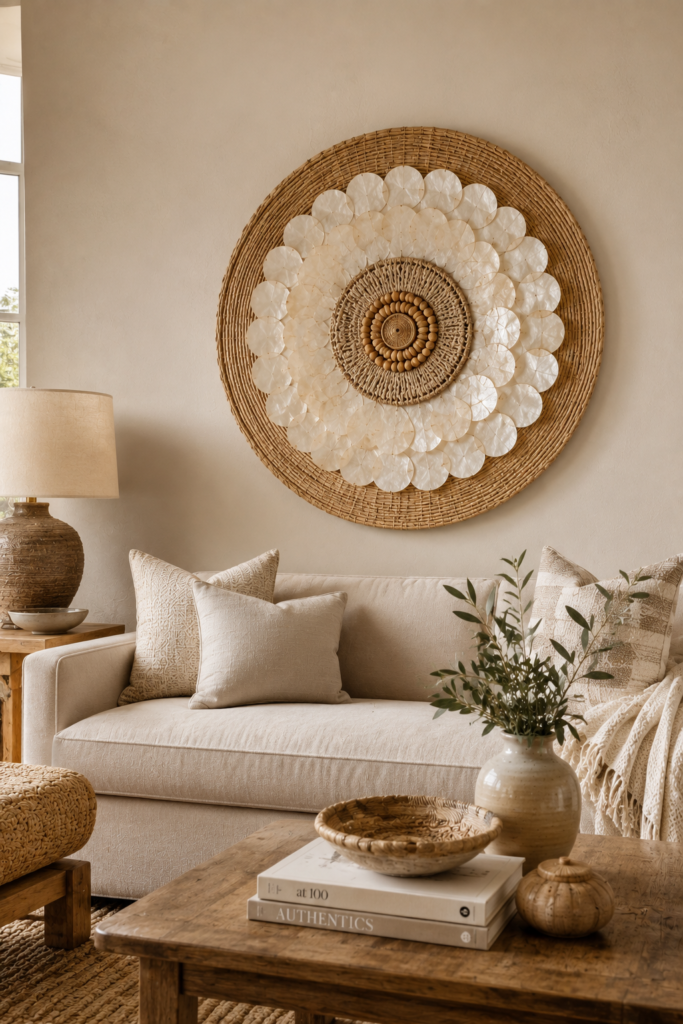
11. Capiz Shell & Rattan Wall Art
📝 Description
Pairing translucent capiz shells with natural rattan creates a beautiful balance between delicate and organic textures. The rattan adds warmth while the shells add a soft reflective quality. This combination works particularly well with modern coastal, boho, and organic interiors.
🧰 Materials
- Round rattan tray
- Capiz shells
- Strong adhesive
- Natural jute cord
- Small wooden beads
- Scissors
- Hanging hook
🔨 How to Make
- Choose a flat rattan tray as the base.
- Arrange capiz shells around the centre.
- Create a simple circular or floral pattern.
- Glue the shells carefully onto the rattan.
- Add a small amount of jute cord around the outer edge.
- Use wooden beads as subtle accents.
- Let the piece dry completely.
- Add a hanging hook to the back.
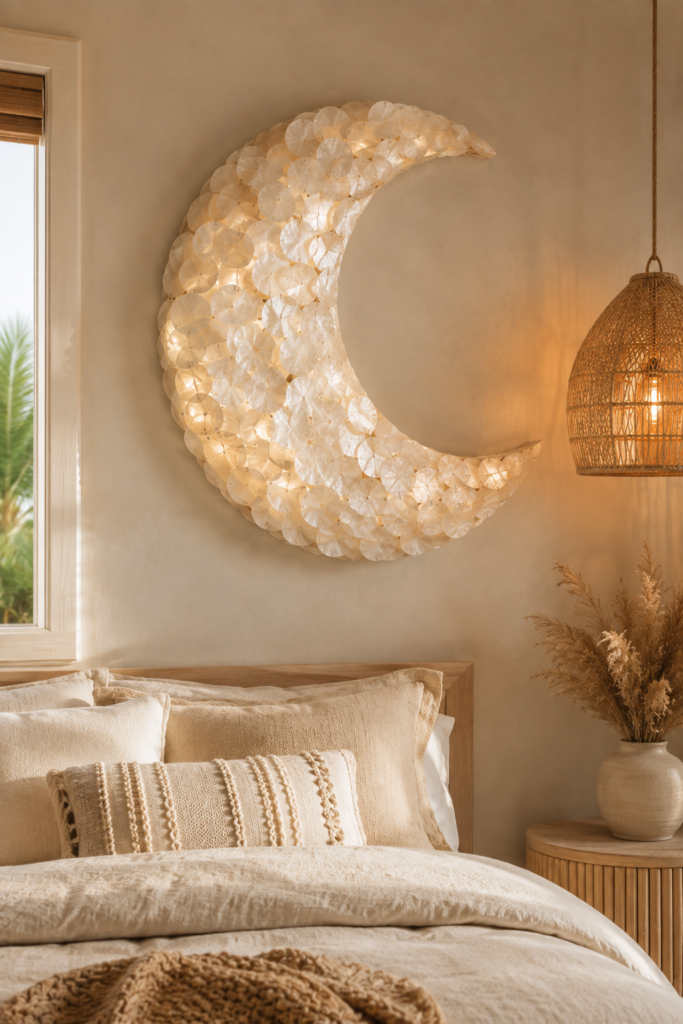
12. Capiz Shell Crescent Moon Wall Art
📝 Description
For something more artistic, create a crescent moon using capiz shells. The curved silhouette gives the wall a sculptural quality while the translucent shells add a soft glow. This design is especially beautiful in bedrooms, reading corners, and peaceful relaxation spaces.
🧰 Materials
- Capiz shell pieces
- Crescent-shaped MDF board
- Neutral acrylic paint
- Strong craft glue
- Thin wooden frame or backing
- Hanging hardware
- Pencil
🔨 How to Make
- Paint the crescent-shaped backing in cream or soft beige.
- Arrange capiz shells along the curved edge.
- Start from the centre and work toward the ends.
- Slightly overlap some shells for texture.
- Glue the shells securely.
- Add a few smaller shells to fill any gaps.
- Allow the artwork to dry completely.
- Attach hanging hardware and mount it securely.
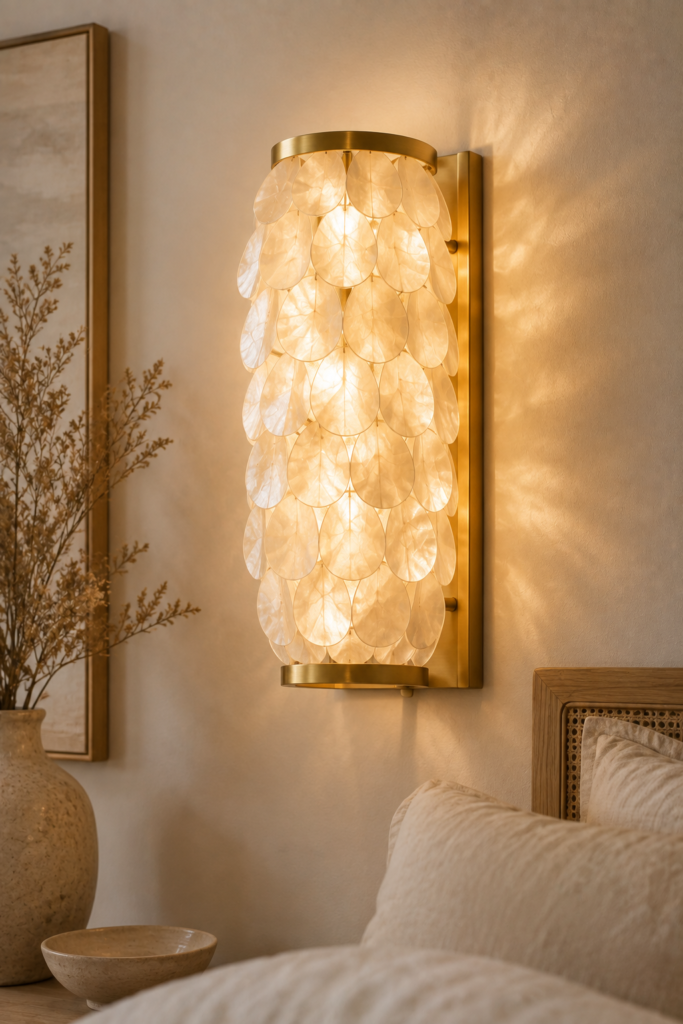
13. Capiz Shell Wall Sconces
📝 Description
Capiz shells aren’t only for flat artwork. You can also use them around decorative wall sconces to create a soft glowing effect. When warm light passes through the translucent shells, they create beautiful shadows and reflections on the wall.
🧰 Materials
- Capiz shell pieces
- Wall-safe decorative sconce frame
- Strong adhesive
- Battery-operated LED light
- Wooden or metal backing
- Hanging hardware
- Optional faux brass paint
🔨 How to Make
- Choose a suitable decorative wall sconce or lightweight frame.
- Arrange capiz shells around the outer section.
- Glue the shells carefully into place.
- Allow the adhesive to cure completely.
- Install a battery-powered LED light inside or behind the design.
- Position the light so it shines through the translucent shells.
- Mount the sconce securely according to the hardware instructions.
- Turn on the light and adjust the shell arrangement if needed.
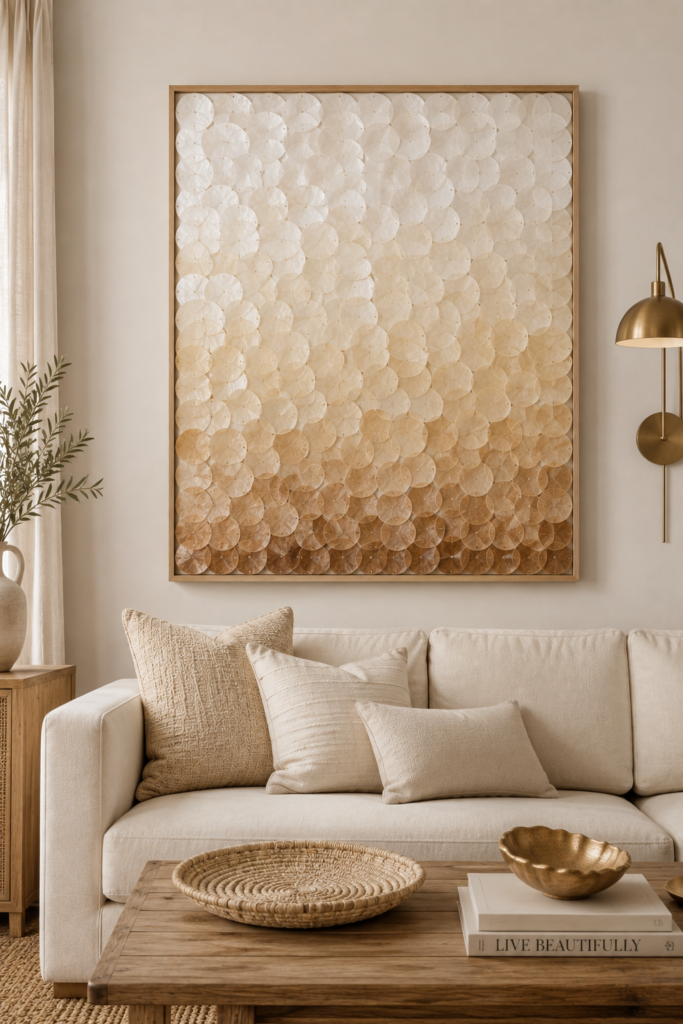
14. Capiz Shell Ombre Wall Art
📝 Description
An ombre shell design creates a subtle colour transition that makes simple materials feel more artistic. Start with darker natural shells or warm beige tones at the bottom and gradually transition toward ivory and white at the top. The result is soft, modern, and sophisticated.
🧰 Materials
- Capiz shells in different natural shades
- Large MDF backing
- Neutral acrylic paint
- Strong craft adhesive
- Thin wood frame
- Measuring tape
- Pencil
- Hanging hardware
🔨 How to Make
- Paint the backing a soft neutral colour.
- Divide the artwork into three or four horizontal sections.
- Arrange the darker shells in the bottom section.
- Gradually use lighter shells toward the middle.
- Finish with ivory and white shells at the top.
- Keep the transition subtle rather than using harsh colour changes.
- Glue the shells once you’re happy with the arrangement.
- Add a simple wood frame.
- Let the piece dry completely before hanging.
How to Make Capiz Shell Decor Look Expensive
The materials are only half of the project. Styling is what makes DIY shell decor look high-end.
1. Stick to a Neutral Palette
Cream, ivory, white, natural wood, beige, and soft brass usually create a more sophisticated appearance than multiple bright colours.
2. Don’t Overdecorate
Capiz shells already have a beautiful translucent texture. Too many ribbons, beads, flowers, and colours can make the project look inexpensive.
3. Use Symmetry
Symmetrical arrangements instantly make handmade decor look more polished. This is especially effective for sunbursts, mirrors, and gallery walls.
4. Choose Better Frames
If you’re framing your shell art, don’t overlook the frame. A simple natural wood, matte black, or subtle brass frame can dramatically improve the final appearance.
5. Use Lighting
Capiz shells look beautiful when light passes through them. Position your wall art near a window or use warm ambient lighting to highlight their natural translucency.
6. Mix Textures Carefully
Pair capiz shells with:
- Natural wood
- Linen
- Rattan
- Jute
- Travertine
- Matte ceramic
- Subtle brass
These materials complement the organic character of the shells without competing with them.
Where to Use Capiz Shell Wall Decor
Capiz shell art works in many rooms throughout the home.
Living Room
Place an oversized piece above a sofa or console table to create a sophisticated focal point.
Bedroom
A shell flower arrangement or soft gallery wall can add a calm, coastal feeling above the bed or dresser.
Entryway
A capiz shell mirror is especially useful because it combines decorative style with a practical function.
Dining Room
A large shell sunburst or wreath can make a dining wall feel more finished without overwhelming the table.
Bathroom
For a coastal bathroom, a small framed shell artwork can complement white tile, natural wood, and woven accessories.
Final Thoughts
Capiz shell wall decor doesn’t have to look like inexpensive beach-themed craft decor. With the right arrangement, neutral colours, quality-looking frames, and simple styling, these translucent shells can become beautiful statement pieces that feel elegant and expensive.
The most important rule is simplicity. Choose one strong design, use a restrained colour palette, and let the natural beauty of the shells do most of the decorating.
Whether you choose a dramatic sunburst, a delicate shell flower, a framed gallery wall, or an oversized statement piece, these DIY ideas can give your home a polished coastal look without the designer price tag.